Dehydrated Candied Oranges
Introduction
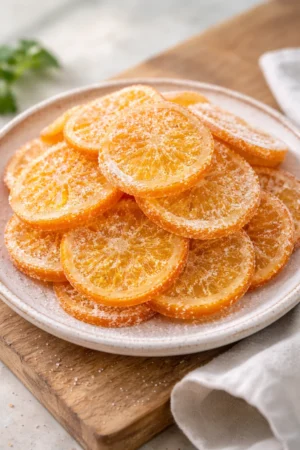
The first time I made Dehydrated Candied Oranges, my kitchen smelled like a holiday market—bright citrus, warm sugar, and a hint of spice that curled around the edges of the house. The slices glistened like little stained-glass ornaments on the cooling rack, and I remember handing one to my grandmother, who closed her eyes and murmured, “That’s sunshine you can eat.” This is a homemade recipe that feels like an indulgent treat and a cozy favorite all at once. It’s simple enough for a quick family snack and special enough to dress up a festive dish.
Why You’ll Love This Recipe
- It’s a comforting and fragrant homemade recipe that fills your home with warmth.
- Flexible timing: you can quick-candy and enjoy in a few hours, or slowly dehydrate for a more intense texture.
- Makes a beautiful garnish or edible gift—perfect for holidays and gatherings.
- Works as an indulgent treat on its own or a healthy option when paired with yogurt or nuts.
- Brings family and friends together—children love helping slice and sprinkle the sugar.
Ingredients with Notes
- 3–4 medium navel or blood oranges, scrubbed and thinly sliced (about 1/8–1/4 inch) — choose firm fruit for cleaner slices.
- 1 cup granulated sugar — creates a classic candied finish; substitute coconut sugar for a deeper, caramel note.
- 1 cup water — forms the simple syrup that poaches the oranges.
- 1 cinnamon stick or 1/2 teaspoon ground cinnamon — optional, adds warmth.
- 2–3 whole cloves or 1/4 teaspoon ground cloves — optional, for a festive spice lift.
- 1 tablespoon lemon juice — helps the syrup set and brightens flavor.
- A pinch of salt — balances sweetness.
Notes and substitutions:
- For a vegan syrup alternative with a slightly different texture, replace up to half the granulated sugar with agave and reduce simmer time.
- If you want sugar-free, try a powdered erythritol blend designed for candying, though texture will differ.
- Use blood oranges for dramatic color and a slightly floral note.
Prep and Cook Time
- Prep time: 15 minutes (plus time to slice carefully)
- Cook time: 20–30 minutes for candying; 2–8 hours for dehydrating (depending on method and desired chew)
- Total time: 2.5–8.5 hours (active time is short; most time is hands-off)
This recipe feels quick because the active steps are few, but the slow drying is where patience rewards you with a tender, almost translucent slice.
Step-by-Step Cooking Instructions for Dehydrated Candied Oranges
- Prepare the oranges: Slice the oranges into even rounds about 1/8–1/4 inch thick. Remove any seeds with the tip of a knife. Even slices ensure consistent candying and drying.
- Make the syrup: In a wide, shallow saucepan, combine sugar, water, cinnamon stick, cloves, and a pinch of salt. Bring to a gentle simmer, stirring until the sugar dissolves.
- Poach the slices: Carefully add orange slices in a single layer. Maintain a low simmer—bubbles should softly ripple, not roar. Poach for 8–12 minutes until the rinds turn translucent and the flesh looks glossy.
- Let them rest: Using a slotted spatula, transfer slices to a wire rack set over a baking sheet. Reserve syrup for glazing or reheat to use later. Let slices cool and set for 30 minutes.
- Dehydrate (oven method): Preheat oven to 200°F (95°C). Place the wire rack with slices in the oven and bake for 2–3 hours, flipping once halfway through. For chewier slices, check at 2 hours; for drier, leave longer.
Dehydrate (dehydrator method): Arrange slices on dehydrator trays and dry at 135–140°F (57–60°C) for 6–10 hours until desired dryness. - Finish and store: If you like, toss cooled slices in a light dusting of sugar for sparkle. Store in an airtight container once completely cool.
You’ll notice the kitchen fills with bright, caramel-sweet aromas when the syrup thins—this is when your patience pays off.
Tips and Variations
- Spice it up: Add star anise, a strip of orange peel to the syrup, or a splash of vanilla at the end.
- Boozy twist: After candying, brush slices lightly with Grand Marnier or dark rum and allow alcohol to evaporate before dehydrating for an adult-friendly note.
- Zest-forward: Use their zest in baked goods, or finely chop candied rinds to fold into granola for a quick family meal accompaniment.
- Lower-sugar option: Reduce sugar by 25 percent and extend poaching a few minutes to help the fruit absorb sweetness.
- Quick gift: Layer slices with parchment in a jar and tie with ribbon for a beautiful homemade present.
Serving Ideas
- As an indulgent treat, enjoy wedges with a cup of tea or mulled wine on a chilly morning.
- Garnish cocktails, desserts, or a festive cheese board—bright color and sweet-tart flavor pair beautifully with aged cheeses and nuts.
- Chop and sprinkle over oatmeal, yogurt, or roasted winter squash for a healthy option with a citrus punch.
- Use as a cozy favorite at holiday brunches, or as a final flourish for a comforting dinner dessert—simple, elegant, and nostalgic.
Storage and Reheating
- Store in an airtight container at room temperature for up to two weeks. If humidity is high, keep them in the refrigerator for up to three weeks.
- To freeze: Lay cooled slices flat on a tray to flash-freeze, then transfer to a freezer bag for up to three months.
- Reheating is not necessary; if slices have softened, a quick 5–10 minute toast in a 250°F oven will revive chewiness and warm the sugars.
Chef’s Pro Tips
- Slice evenness matters: Use a mandoline or steady knife to keep thickness consistent for even drying.
- Don’t rush the simmer: Gentle poaching ensures the peel becomes tender without breaking apart.
- Single layer is key: Overlapping slices during candying or dehydrating will cause uneven texture.
- Save the syrup: The leftover citrus syrup is wonderful over pancakes, in cocktails, or stirred into yogurt.
- Cool completely before storing: Trapped steam leads to stickiness and spoilage.
FAQs
Q: Can I use lemons or limes instead?
A: Yes—lemons make a brighter, tangier version; limes will be punchy. Adjust sugar slightly upward for tart fruit.
Q: Are these vegan?
A: Yes, using granulated sugar and water keeps it vegan. If you substitute honey, it becomes non-vegan.
Q: How long do they last?
A: At room temperature in an airtight container, up to two weeks. Refrigerated, three weeks. Frozen up to three months.
Q: Can I skip dehydrating and just candy them?
A: Absolutely. Candied orange slices can be enjoyed right after cooling; dehydrating gives them a chewy, lasting texture and makes them easier to store.
Q: Any allergy considerations?
A: Watch cross-contamination with sugar alternatives or add-ins like nuts. The base recipe is nut-free and gluten-free.
Conclusion
I hope this recipe for Dehydrated Candied Oranges finds a place on your table, whether as a bright accent to a comforting dinner, a festive dish centerpiece, or a small, sweet gift to share. If you’d like a visual guide to traditional candied orange slices to compare techniques, check out this lovely tutorial: Candied Orange Slices – This Jess Cooks. Make a batch, breathe in that warm citrus scent, and pass a slice to someone you love—the happiest recipes are the ones we share.
Contents
Dehydrated Candied Oranges
Ingredients
Oranges and Flavorings
- 3–4 medium medium navel or blood oranges, scrubbed and thinly sliced Choose firm fruit for cleaner slices.
- 1 cup granulated sugar Creates a classic candied finish; substitute coconut sugar for a deeper, caramel note.
- 1 cup water Forms the simple syrup that poaches the oranges.
- 1 stick cinnamon stick Optional, adds warmth.
- 2–3 whole whole cloves Optional, for a festive spice lift.
- 1 tablespoon lemon juice Helps the syrup set and brightens flavor.
- a pinch salt Balances sweetness.
Instructions
Preparation
- Slice the oranges into even rounds about 1/8–1/4 inch thick. Remove any seeds with the tip of a knife.
- In a wide, shallow saucepan, combine sugar, water, cinnamon stick, cloves, and a pinch of salt. Bring to a gentle simmer, stirring until the sugar dissolves.
- Carefully add orange slices in a single layer. Maintain a low simmer—bubbles should softly ripple, not roar. Poach for 8–12 minutes until the rinds turn translucent and the flesh looks glossy.
- Using a slotted spatula, transfer slices to a wire rack set over a baking sheet. Reserve syrup for glazing or reheat to use later. Let slices cool and set for 30 minutes.
Dehydrating
- Preheat oven to 200°F (95°C). Place the wire rack with slices in the oven and bake for 2–3 hours, flipping once halfway through. For chewier slices, check at 2 hours; for drier, leave longer.
- Arrange slices on dehydrator trays and dry at 135–140°F (57–60°C) for 6–10 hours until desired dryness.
- If you like, toss cooled slices in a light dusting of sugar for sparkle. Store in an airtight container once completely cool.
Notes
Written by Salaheddine — founder of Tasty Sunrise, sharing easy and comforting homemade recipes for every occasion.